



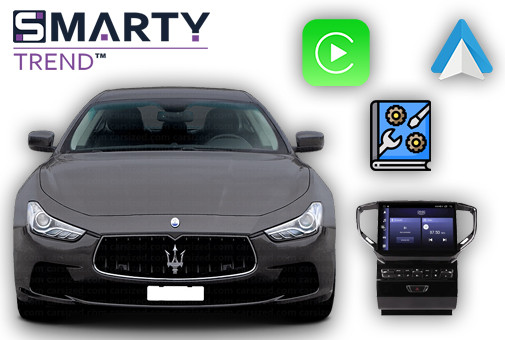
Guide to Installing and Setting Up an Android Head Unit in Maserati Ghibli (2013-2015)
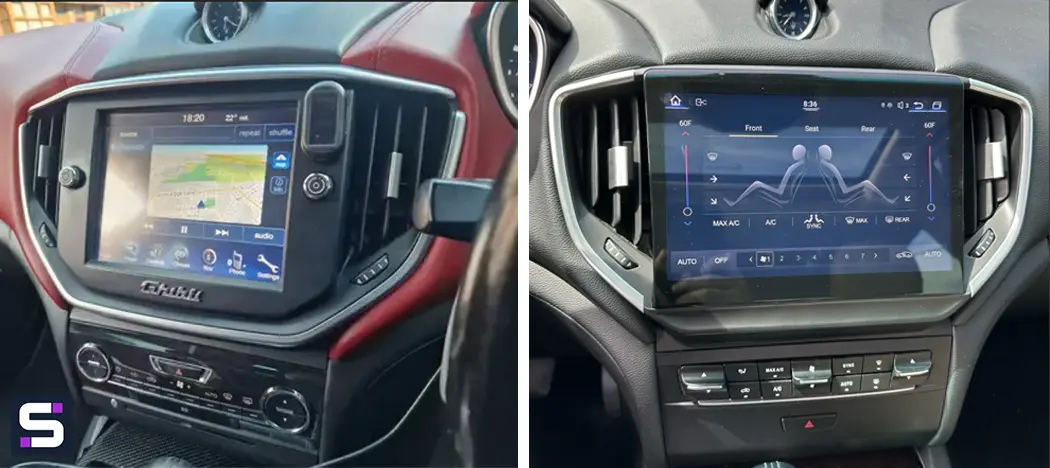
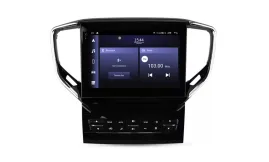
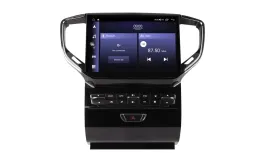
Replacing the factory multimedia system in the Maserati Ghibli (2013-2015) with a modern Android-based head unit is the best way to equip this premium sedan with up-to-date functionality. The upgraded system provides access to real-time navigation, wireless Apple CarPlay and Android Auto interfaces, an advanced DSP processor, and preserves full integration with the vehicle's onboard systems via the CAN bus.
This article presents a detailed step-by-step guide for disassembly, wiring connection, CAN decoder software configuration, and factory amplifier adjustment.
1. Compatibility and Technical Specifications
The factory system of the Maserati Ghibli (2013-2015) is built on the FCA architecture, which requires precise selection of the CAN protocol when replacing the head unit. Below is a comparison of the basic functionality of the OEM system and the upgraded Android unit.
| Parameter | Factory System (OEM) | Upgraded Android System |
|---|---|---|
| Compatibility | Maserati Ghibli (2013-2015) | Maserati Ghibli (2013–2015) |
| Connection Type | Factory connector | Plug & Play (no cutting of factory wiring) |
| Audio System Support | Base / Premium | Full retention of control via CAN bus |
| Climate Control | Physical buttons / Display | Duplicated on touchscreen + buttons |
| Rearview Camera | Factory camera | OEM camera support + optional AHD 1080p |
| Connectivity Interfaces | Limited Bluetooth | Apple CarPlay, Android Auto, Wi-Fi, 4G LTE, DSP |
2. Preparation and Required Tools
Before starting any installation work, disconnect the vehicle's power supply (disconnect the negative battery terminal) to avoid short circuits and errors in control modules.
Tools Required:
- Plastic Pry Tools (Prying Spatulas): For safe removal of panels without damaging leather and plastic.
- Phillips Screwdriver (PH2): For removing screen and climate control panel fasteners.
- Socket Wrench Set: For disassembling center console elements.
- Side Cutters / Pliers: For trimming plastic cable ties.
- 3M Double-Sided Tape: For secure mounting of the CAN module and external units.
- Insulating Tape (TESA): For protective wrapping of connectors and preventing extraneous noises.
3. Step-by-Step Disassembly of the Factory Head Unit
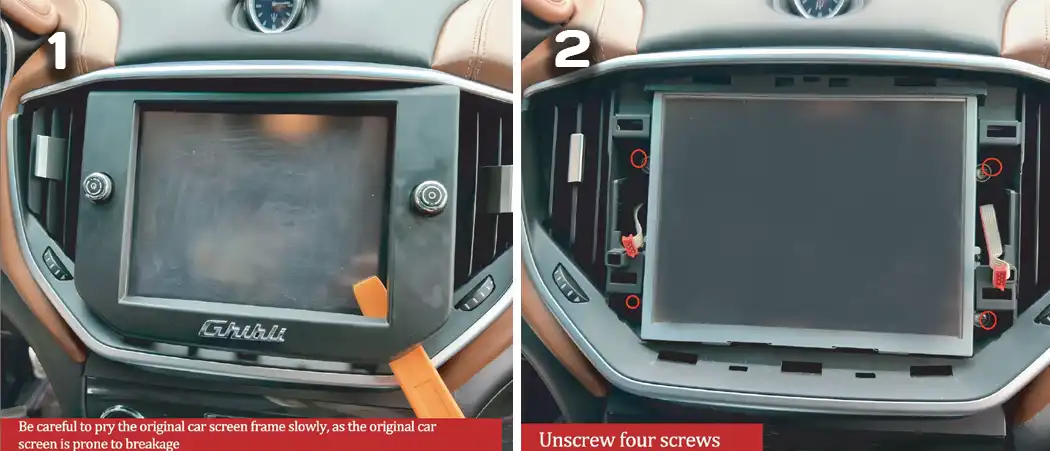
- Removing the Screen Trim: Carefully pry off the factory display bezel using a plastic pry tool. Act smoothly to avoid damaging the screen.
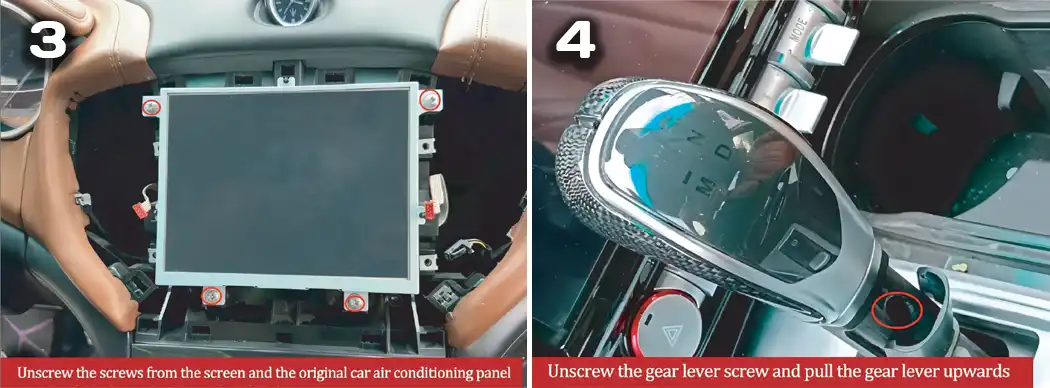
- Removing the Display: Unscrew the 4 mounting screws around the perimeter of the screen and remove it from the cavity.
- Releasing the Climate Control Unit: Remove the screws securing the climate control panel and the lower part of the display.
- Removing the Gear Shift Knob: Unscrew the gear selector lock and pull the knob upward.
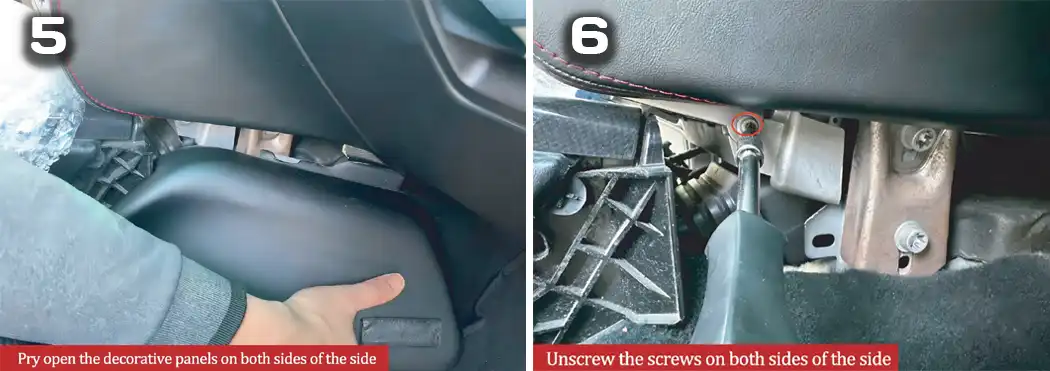
- Removing the Side Panels: Using a plastic tool, pry off and remove the decorative side panels of the center console.
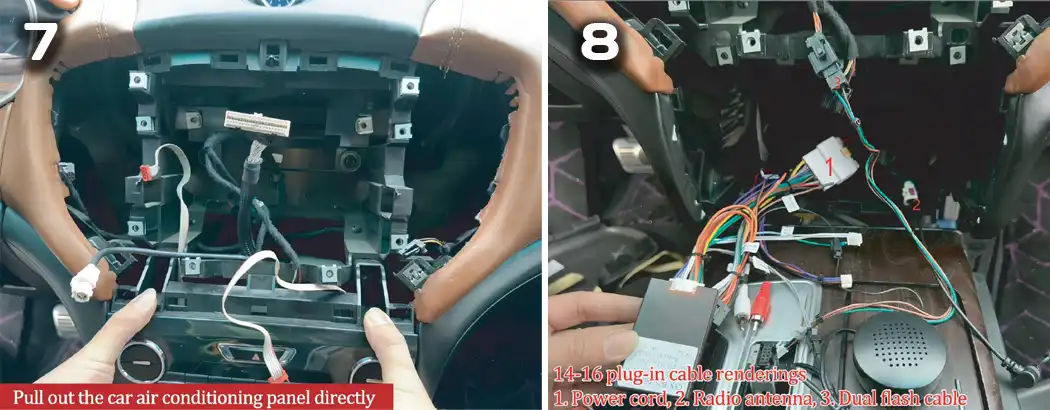
- Removing the Climate Control Panel: Unscrew the side mounting screws on both sides and gently pull the climate control panel toward you, removing it from its slots to access the wiring.
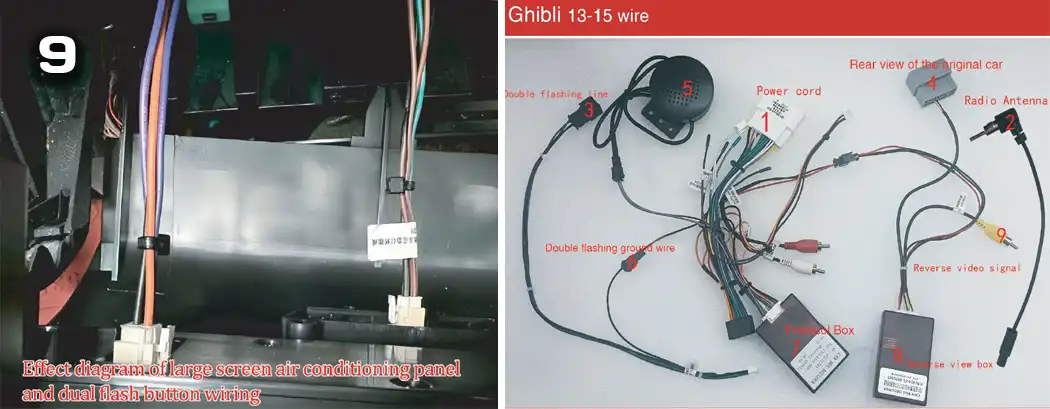
4. Wiring Diagram and Connector Purpose (Plug & Play)
Connection of the new system is performed connector to connector. All harness components must be correctly routed and secured.
| # | Component Name | Purpose and Connection Features |
|---|---|---|
| 1 | Power Cord (Main Power Harness) | Connects to the main factory vehicle harness. |
| 2 | Radio Antenna (Radio Antenna Adapter) | Connects to the factory antenna cable. |
| 3 | Double Flash Cable (Hazard Button Cable) | Connects to the hazard light button. |
| 4 | Rear View of Original Car (Camera Connector) | Connects to the factory video camera module. |
| 5 | Canbus Box (CAN-bus Decoder) | Reads steering wheel controls, climate, ignition, and door data. |
| 6 | Rear View Box (Video Processing Module) | Ensures correct operation of the original rearview camera. |
| 7 | Reverse Video Signal (RCA Output) | Transmits the video signal from the camera to the Android unit video input. |
| 8 | Double Flashing Ground Wire | Ground wire for the hazard light system. |
5. Software Setup: CAN Protocol Selection
After completing the physical installation and applying power, it is necessary to set up communication between the Android head unit and the vehicle's onboard network via CAN bus.
Setup Procedure:
- Go to the main menu of the device and select Settings.
- Navigate to the Factory Settings section.
- Enter the access password:
123456or3368. - Find the Model Options / Protocol item.
- Set the parameters according to the table below:
| Menu Parameter | Value to Select | Note |
|---|---|---|
| Canbus Manufacturer (Canbus) | RAISE (or Raise 修正 / LZ) |
Matches the labeling on the decoder housing |
| Car Brand | Chrysler / Maserati |
Chrysler is used due to the shared FCA architecture |
| Model | 300C |
Compatible platform protocol |
| Year | 2015 |
Ensures correct data exchange |
Confirm your choice and wait for the device to automatically reboot.
6. Sound Setup and Factory Amplifier Tuning
If after the initial boot you observe low volume or insufficient speaker dynamics, you need to adjust the gain level of the factory amplifier via the Android menu.
Volume Level Calibration Instructions:
- In the main menu, open the Vehicle Info app.
- Go to Vehicle Settings → Amplifier Settings.
- Navigate to Vehicle Personalization.
- Locate the Original Car Volume parameter.
- Set the volume level to
28. - If available, enable the DSP Surround option to activate surround sound.
7. Troubleshooting
| Symptom / Problem | Possible Cause | Solution |
|---|---|---|
| Low volume or lack of bass | Factory amplifier volume level set too low | Go to Vehicle Info → Amplifier Settings and set Original Car Volume to 28. |
| Steering wheel controls do not work | CAN protocol not selected or reset | Check the physical connection of the CAN box and verify settings: Raise → Chrysler → 300C → 2015. |
| Black screen when selecting reverse gear | Video input or Rear View Box cable not connected | Check the connection of the yellow RCA plug Reverse Video Signal and the power supply of the video processing module. |
| Climate control data not displayed | No communication over the CAN bus | Perform a reset and reselect the protocol, followed by a full reboot of the device. |
| Hazard button does not work | Plug or ground wire not connected | Check the Double Flash Cable connection and the contact of the Double Flashing Ground Wire. |
8. Final Checklist and Reassembly
Before securing all elements of the center console, perform a final inspection:
- ✔ Steering wheel controls: check volume control, track switching, and call answer buttons.
- ✔ Climate control: check temperature adjustment, airflow direction, and screen display.
- ✔ Rearview camera: check automatic screen switching when moving the gear selector to R.
- ✔ Hazard lights: check physical button operation.
- ✔ Sound and navigation: check all speakers, radio reception, and GPS module operation.
After completing the check, reinstall the climate control unit, gear shift knob, side trims, and screen frame in reverse order.



 EN
EN DE
DE
 ES
ES
 FR
FR
 IT
IT
 NL
NL
 PL
PL
 PT
PT
 RU
RU
 WhatsApp