


How to Set Up DSP Sound on Your Android Head Unit
Premium hardware is only half the story. Learn how to correctly configure your Android head unit’s built-in DSP - from crossovers to time alignment - to unlock the true sonic potential of your system.
How to Set Up DSP Sound on Your Android Head Unit: Complete 2026 Guide
A digital signal processor (DSP) built into a modern Android head unit is one of the biggest upgrades over a stock factory radio - but only if it's actually configured. Out of the box, even a premium unit with a dual DSP chip, 32-band EQ, and per-channel time correction will sound flat, boxy, or unbalanced until someone tunes it. This guide walks through the full process, in the order a professional installer would actually do it, so you get a result that matches what the hardware is capable of.
This is not a "turn the bass up" tutorial. It's a complete workflow: gain staging, crossover points, time alignment, and equalization, plus the mistakes that ruin sound quality even on excellent hardware.
What DSP Actually Does in a Car Head Unit
A built-in DSP sits between the source (radio, Bluetooth, USB, CarPlay/Android Auto) and the amplifier stage. Instead of sending one blended signal to all speakers, it splits the audio into separate paths and lets you control, per channel:
- Crossover frequency and slope - which frequencies go to tweeters, midrange, and subwoofer.
- Time alignment (time correction) - delaying closer speakers so sound from all speakers reaches your ears at the same moment.
- Parametric or graphic EQ (commonly 31-32 bands on premium units) - correcting frequency response for the cabin's acoustics.
- Output level per channel - balancing left/right and front/rear.
- Subwoofer phase and low-pass point.
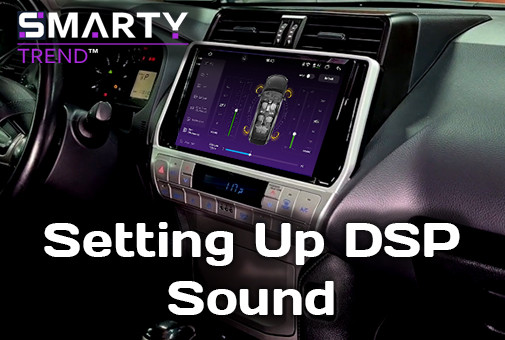
On units like SMARTY Trend's 2K Ultra-Premium line, this is handled by a dedicated audio processor paired with a Hi-Fi amplifier (commonly a TDA7850-class 4×50W stage), with dual DSP for independent front/rear zones and optical/coaxial digital output for lossless connection to an external amp. The hardware is only half the story - the settings are what determine whether it's used correctly.
What You'll Need Before You Start
- A quiet parking spot, engine off, doors closed.
- A phone with an SPL meter or RTA (real-time analyzer) app - free apps are accurate enough for this purpose.
- A set of test tracks: pink noise, a vocal-heavy track you know well, and a bass sweep or subwoofer test track.
- A tape measure (for time alignment).
- 20-30 minutes of uninterrupted time - DSP tuning is not a five-minute job.


Step 1: Set Gain Structure First - Before Touching EQ
This is the step most people skip, and it's the reason a lot of DSP setups sound distorted or noisy despite a "perfect" EQ curve.
- Set all EQ bands to flat (0 dB) and all channel levels to equal.
- Play a track at a level you consider "loud but clean" - around 75% of your usual max volume.
- Increase the head unit's master volume until you hear the first signs of distortion (clipping, harshness), then back off 2-3 dB.
- Only after this ceiling is set should you touch individual channel gains, crossovers, or EQ.
Setting the EQ before the gain structure means every later adjustment is built on a broken foundation - you'll be compensating for clipping instead of tuning tone.
Step 2: Configure the Crossovers (HPF/LPF)
Crossovers protect your speakers and remove frequencies each driver can't reproduce cleanly.
Front and rear speakers (typically 2-way or coaxial):
- Set a high-pass filter (HPF) at 80-120 Hz for standard factory-size speakers (most 6.5"/6x9" coaxials struggle below 80 Hz anyway).
- Use a 12 dB/octave slope for a natural, blended sound; use 24 dB/octave if your speakers are small and you're running a dedicated subwoofer that needs to take over cleanly.
Subwoofer:
- Set a low-pass filter (LPF) between 80-120 Hz, matching the front HPF point so there's no gap or overlap in the mids.
- If bass sounds "one-note" or boomy, lower the LPF closer to 63-80 Hz.
Tweeters (if separate from mids):
- HPF around 3-5 kHz, adjusted by ear - too low and vocals sound thin/harsh, too high and you lose sparkle.
The goal is a seamless handoff between drivers - no dip or peak where one frequency range ends and the next begins.
Step 3: Time Alignment (Time Correction)
Sound from your left door speaker reaches your ear far sooner than sound from the right door speaker, because you're not sitting in the middle of the car. Time alignment delays the closer speakers so every driver's output arrives simultaneously - this is what creates a stable, centered "phantom center" image instead of sound that feels like it's coming from the door next to you.
How to do it:
- Sit in the driver's seat in your normal position.
- Measure the distance from your ears to each speaker (tweeter, mid, sub) in centimeters.
- Identify the longest distance - that speaker gets zero delay.
- For every other speaker, calculate the difference or enter the delay.
If your Android operating system requires entering values directly in milliseconds (ms) rather than centimeters (cm), use the standard acoustic formula to calculate the path-length difference:
Delay (ms) = Δd (cm) ÷ 34.3
Most 2K Ultra-Premium DSP units let you input distance directly, which the processor converts automatically - this is the more accurate and less error-prone method if it's available on your unit.
After setting delays, play a mono/vocal track. The voice should sound like it's coming from a single point in the middle of the dashboard, not pulled to one side.
Step 4: Equalization - Correcting the Room, Not Just the Taste
With gain, crossovers, and time alignment done, the 32-band EQ is for fixing what your cabin's acoustics do to the sound - glass, dashboard shape, and seating all cause specific frequencies to boost or cancel.
Practical approach:
- Play pink noise and use an RTA app to see which frequency bands are peaking or dipping relative to a flat line.
- Cut narrow peaks (don't boost dips as aggressively - cutting sounds more natural and avoids adding distortion).
- Make changes in small increments (1-2 dB), listening after each change on familiar tracks - not just the RTA graph.
- Avoid the "smiley face" EQ curve (boosted bass and treble, cut mids) - it feels exciting for 30 seconds in a showroom demo and causes listening fatigue on a real drive.
Common Car-Cabin Corrections Matrix
| Frequency Range | Acoustic Phenomenon in Cars | Recommended Action (DSP Tuning) |
|---|---|---|
| 60 - 100 Hz | Cabin resonance, boomy or muddy bass. | Cut by 2-4 dB using a narrow Q-factor rather than lowering sub level. |
| 150 - 300 Hz | Phase cancellation due to floor/door reflections. | Slight boost (+2 to +3 dB) to restore male vocal warmth and snare punch. |
| 1 - 3 kHz | Ear level harshness caused by windshield and side glass reflections. | Smooth cut of 2-4 dB to eliminate listening fatigue during long road trips. |
| 10 kHz+ | High-frequency roll-off or cheap coaxial tweeter piercing sound. | Gentle shelving boost (+1 dB) for high-end QLED platforms to add "air". |
Step 5: Subwoofer Level and Phase
Set subwoofer level by ear relative to the front stage - it should reinforce bass, not dominate the mix. If you can identify the subwoofer as a separate sound source, it's too loud or improperly time-aligned.
Check phase (0°/180°) by listening to a bass-heavy track: if bass sounds thin or hollow compared to when the sub is muted, flip the phase switch - it should sound fuller in the correct setting.
Step 6: Save Your Preset and A/B Test
- Save the configuration as a named preset (e.g., "Daily Tune").
- Compare against the factory default preset on the same track to confirm the improvement is real, not just different.
- Re-check after a few days of normal driving - your ear adjusts, and small tweaks are normal.
Common DSP Setup Mistakes
- Tuning EQ before gain structure - leads to chasing distortion instead of tone.
- Setting crossovers by spec sheet numbers alone - actual speaker cutoff varies with door sealing and enclosure, always confirm by ear.
- Skipping time alignment entirely - this is the single most impactful step for imaging, and the most commonly skipped because it takes measuring.
- Overusing boost instead of cut - boosting problem frequencies raises the noise floor and risks clipping; cutting is safer and usually sounds more natural.
- Copying someone else's EQ curve - every cabin, speaker set, and hearing preference is different; a curve tuned for one car and one person rarely transfers directly.
Frequently Asked Questions
Do I need external equipment to tune a car DSP?
No - a smartphone RTA app and test tracks are enough for a very solid home tune. Professional installers use calibrated microphones for a more precise result, but the workflow above gets most of the improvement without extra hardware.
Can I use time alignment without a subwoofer?
Yes. Time alignment works on any multi-speaker setup - front/rear or left/right - and improves imaging even with only stock door speakers.
Will DSP tuning damage my speakers?
No, as long as gain structure is set correctly first (Step 1). Most damage risk from DSP tuning comes from raising levels into clipping, not from the EQ or crossover settings themselves.
How often should I re-tune?
Re-check after any speaker or amplifier change, and it's worth a light re-listen every few months as your ear adapts - but a properly measured time alignment and crossover setup rarely needs redoing.
What's the difference between a single DSP and a dual DSP setup?
A dual DSP configuration processes front and rear channels independently, giving separate EQ, crossover, and time correction per zone instead of one shared setting for the whole car - useful for systems where front and rear speakers differ in size or mounting position.
Looking for a head unit with a built-in dual DSP processor?
Our units offer a 32-band EQ and digital optical/coaxial outputs for unparalleled acoustic clarity.
Browse SMARTY Trend’s Ultra-Premium Units

| Operation system: | Android 14 |
| Display: | 10.4 inches QLED 2.5D |
| Resolution: | 2K (2000x1200 px) / HD (1280x720 px) |
| Processor: | 2.7 GHz Octa-core (UIS7870CS) |
| RAM + SSD: | 4+64 / 6+128 / 8+128 / 8+256 / 12+256 Gb |
| Car link: | Wireless Apple CarPlay & Android Auto |
| Free gift: | DVR with ADAS / TPMS / HD Rear Camera |
| Operation system: | Android 14 |
| Display: | 9.5 inches QLED 2.5D |
| Resolution: | 2K (2000x1200 px) / HD (1280x720 px) |
| Processor: | 2.7 GHz Octa-core (UIS7870CS) |
| RAM + SSD: | 4+64 / 6+128 / 8+128 / 8+256 / 12+256 Gb |
| Car link: | Wireless Apple CarPlay & Android Auto |
| Free gift: | DVR with ADAS / TPMS / HD Rear Camera |

Android Head Unit Processors Guide 2026: Snapdragon vs. UIS Full...
How to Set Up CanBus on Android Car Radio: Step-by-Step

Android Head Unit vs. Factory Radio: Is It Worth Upgrading in 2026?

Best Android Head Units 2026: Top Car Stereo Upgrade Guide

Support for factory amplifier operation in SMARTY Trend car radios