



Guide d'Installation Autoradio Android 15 pour Toyota C-HR (2016-2023) : SMARTY Trend 2K QLED avec CarPlay et Intégrat
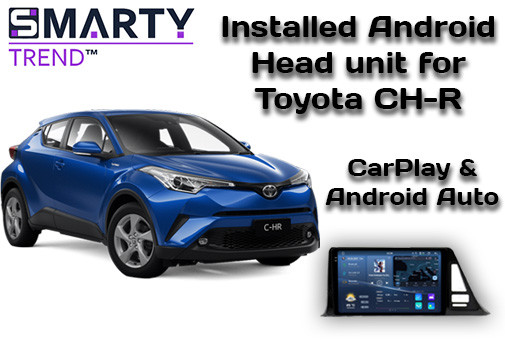
Résumé du contenu : Guide d'installation étape par étape de l'autoradio Android 15 SMARTY Trend dans une Toyota C-HR (2016-2023). Découvrez comment monter l'écran 2K QLED, conserver la caméra de recul d'origine et configurer le module CAN-Bus en Plug & Play.
Guide d'installation complet : Autoradio Android SMARTY Trend pour Toyota C-HR (2016-2023)
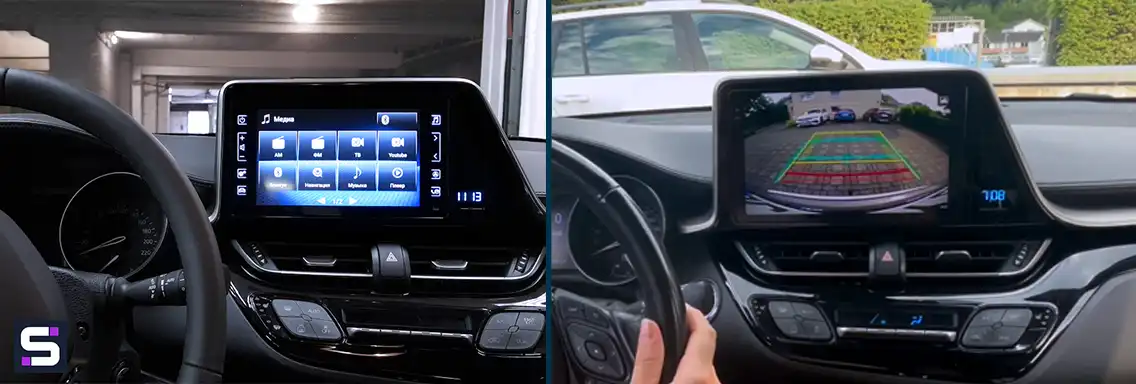
La Toyota C-HR (2016-2023) est un crossover urbain élégant et fiable, mais son système multimédia d'origine Toyota Touch 2 est aujourd'hui dépassé par rapport aux normes modernes. Il manque de rapidité, de résolution d'écran et d'une intégration sans fil fluide avec les smartphones. Dans ce guide d'expert, nous allons détailler comment remplacer l'écran d'origine par un autoradio Android SMARTY Trend haut de gamme avec Apple CarPlay et Android Auto, tout en conservant l'intégralité des fonctionnalités d'origine du véhicule.
Écran d'origine vs Système multimédia SMARTY Trend
Pour comprendre l'importance de cette mise à niveau en termes d'ergonomie, de performances et de qualité audio, comparons les caractéristiques clés :
| Fonctionnalité | Toyota Touch 2 d'origine | Système Premium SMARTY Trend |
|---|---|---|
| Système d'exploitation | Système d'origine fermé (très restreint) | Android 15 (Accès à des millions d'applications Play Store) |
| Processeur (CPU) | Puce basse fréquence obsolète | 2.7 GHz Octa-core (UIS7870CS) - Réponse instantanée |
| Mémoire (RAM + SSD) | Moins de 1-2 Go / Stockage minimal | 12 Go RAM + 256 Go SSD (Multitâche fluide) |
| Écran & Dalle | 7-8" TN/IPS (couleurs ternes, reflets du soleil) | 9.5" QLED 2.5D (Couleurs éclatantes, revêtement antireflet) |
| Résolution d'écran | 800x480 pixels (pixellisation visible) | 2K Super HD (2000x1200 px) - Clarté cristalline |
| Navigation | Cartes Toyota obsolètes (mises à jour payantes requises) | Google Maps, Waze, Sygic avec info-trafic en temps réel |
| Interface Smartphone | CarPlay/AA filaire limité (modèles restylés uniquement) | Apple CarPlay et Android Auto sans fil intégrés |
1. Outils & Équipements requis
Aucun équipement d'atelier professionnel spécialisé n'est requis pour réussir cette installation. L'ensemble du processus peut être réalisé à l'aide d'un jeu d'outils de base :
- Clé à cliquet avec douille de 10mm - Utilisée pour retirer les 4 boulons principaux fixant l'autoradio d'origine.
- Tournevis cruciforme #2 - Pour fixer les bouches d'aération et transférer les modules d'origine de l'horloge et des airbags passagers.
- Outils de démontage en plastique - Pour déclipser les panneaux du tableau de bord en toute sécurité sans rayer les plastiques intérieurs.
- Chiffon doux ou serviette de protection - À placer sur la console centrale et le levier de vitesses pour éviter les rayures accidentelles pendant le montage.
2. Avantages clés de l'intégration du SMARTY Trend
- Intégration CAN-Bus complète : L'autoradio communique directement avec l'ordinateur de bord, conservant ainsi les commandes au volant et l'affichage des données de climatisation.
- Prise en charge de la caméra de recul d'origine : La caméra d'origine se branche directement sur le nouveau système, activant les Lignes de Stationnement Dynamiques (lignes de guidage actives) qui réagissent à l'angle du volant.
- Esthétique de l'habitacle préservée : Le remontage du bloc d'origine de l'horloge et des feux de détresse garantit que votre tableau de bord conserve son aspect soigné et d'origine.
3. Guide d'installation étape par étape
Avant de commencer, coupez le moteur, assurez-vous que le contact est complètement éteint (OFF) et débranchez la borne négative de la batterie par mesure de sécurité. Recouvrez la console centrale d'un chiffon doux pour protéger l'intérieur.
Étape 1 : Démontage de l'autoradio d'origine & des panneaux
- À l'aide d'un outil de démontage en plastique, soulevez délicatement et retirez la garniture décorative latérale du tableau de bord ainsi que le panneau de climatisation. Ils sont maintenus par des clips d'origine.
- Déclipsez délicatement le bloc des bouches d'aération centrales. Notez qu'il est fixé par deux vis. Retirez-les à l'aide d'un tournevis cruciforme #2, puis sortez le bloc d'aération après avoir débranché le connecteur du bouton des feux de détresse.
- Retirez le cadre principal en plastique (façade) entourant l'écran d'origine. Soyez particulièrement prudent dans l'angle droit, près du bouton de démarrage Push Start - appliquez une pression douce et uniforme. Débranchez la prise alimentant l'horloge et les voyants d'airbag passager.
- À l'aide d'une clé à cliquet avec douille de 10mm, dévissez les 4 boulons de fixation qui maintiennent les supports métalliques de l'écran d'origine à l'intérieur de la cavité du tableau de bord.
- Tirez l'autoradio d'origine vers vous, glissez-le hors du tableau de bord et débranchez délicatement tous les connecteurs de câblage à l'arrière.
Étape 2 : Modification du cadre & transfert des composants d'origine
- Placez le panneau de tableau de bord d'origine retiré face contre terre sur une surface plane et douce.
- À l'aide de votre tournevis cruciforme, dévissez et retirez le module d'origine de l'horloge et des voyants de sécurité.
- Placez ce module dans la nouvelle façade/cadre SMARTY Trend incluse dans le kit et fixez-le solidement à l'aide des vis d'origine. Cela préserve parfaitement votre horloge d'origine et les voyants de ceinture passager.
Étape 3 : Raccordement du faisceau de câbles (Plug & Play)
- Prenez le faisceau de câbles principal fourni dans le kit SMARTY Trend.
- Branchez les fiches d'origine du véhicule dans les connecteurs correspondants du nouveau faisceau ("connecteur à connecteur"). Aucun découpage, épissure ou soudure de fils d'origine n'est requis.
- Branchez le boîtier décodeur CAN-Bus sur le connecteur dédié du faisceau principal.
- Emplacement des antennes & des ports :
- Antenne GPS : Installez-la dans un endroit où aucun obstacle métallique ne se trouve au-dessus d'elle afin de ne pas bloquer les signaux satellites. Il est fortement recommandé de la positionner et de la coller directement sous la partie supérieure en plastique du tableau de bord.
- Antennes 4G/Wi-Fi & ports USB supplémentaires : Acheminez soigneusement ces câbles dans la boîte à gants pour un accès futur facile.
- Branchez tous los connecteurs restants sur les ports arrière du nouvel autoradio SMARTY Trend.
Étape 4 : Montage du nouvel autoradio Android
- Positionnez délicatement l'unité entièrement assemblée (écran QLED de 9.5" intégré dans la nouvelle façade) dans l'ouverture du tableau de bord.
- Fixez le système à l'aide des boulons d'origine de 10mm et réinstallez les bouches d'aération centrales et les garnitures dans l'ordre inverse du démontage. Assurez-vous que tous les clips sont fermement enclenchés sans aucun espace.
4. ⚙️ Configuration du module CAN-Bus pour un fonctionnement correct
Après avoir allumé l'autoradio pour la première fois, vous devez synchroniser le système Android avec l'ordinateur de bord de la Toyota C-HR via le réseau CAN-Bus. Sans cette étape, les commandes au volant et les lignes de caméra dynamiques ne fonctionneront pas.
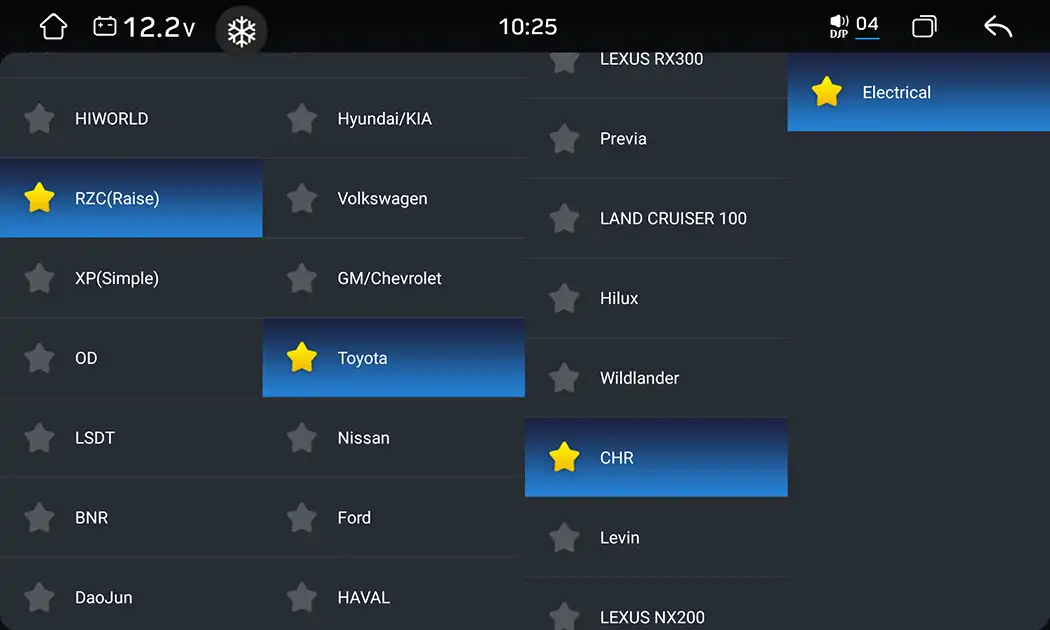
- Naviguez vers Paramètres > Multimédia Voiture > Paramètres d'usine.
- Saisissez le code d'accès développeur (généralement
3368ou8888, selon la version spécifique du micrologiciel de votre UIS7870CS). - Localisez le menu Paramètres CAN-Bus / Sélection du modèle de voiture.
- Sélectionnez le fabricant de votre boîtier décodeur CAN (par ex. Raise, Simple Soft ou Hiworld - la marque est imprimée directement sur le boîtier en plastique du module CAN).
- Sélectionnez la marque de la voiture : Toyota > Modèle : C-HR > et choisissez l'année correspondante à votre véhicule (2016-2023).
- Cliquez sur Enregistrer et laissez le système redémarrer.
Une fois redémarré, le système se synchronisera automatiquement mit votre véhicule. Testez les boutons de volume et de changement de piste au volant, vérifiez si l'ouverture des portes déclenche des alertes à l'écran, et passez la marche arrière pour vérifier que la caméra d'origine s'active bien avec ses lignes de guidage dynamiques.
5. Tutoriel vidéo étape par étape
Si vous préférez un aperçu visuel du démontage des panneaux, des connexions et du superbe résultat final, consultez notre guide vidéo complet réalisé par nos spécialistes de l'installation :
6. Foire aux questions (FAQ)
Q : Ma caméra de recul d'origine fonctionnera-t-elle toujours ?
R : Oui. L'autoradio SMARTY Trend prend entièrement en charge la caméra de recul d'origine (OEM). De plus, grâce au module CAN-Bus, les lignes de guidage actives pivotent lorsque vous tournez le volant.
Q : Cette installation annule-t-elle la garantie de mon véhicule ?
R : Non. L'installation est 100% Plug & Play. Le faisceau de câbles d'origine de la voiture reste totalement intact, sans aucune découpe de fil, ce qui signifie que le processus est entièrement réversible et sans danger pour les garanties électriques du concessionnaire.
Q : L'horloge d'origine du tableau de bord fonctionne-t-elle toujours après le remplacement ?
R : Oui, ce guide inclut l'étape cruciale du transfert du module de l'horloge et des feux de détresse d'origine dans le nouveau cadre SMARTY Trend fourni. Toutes les fonctions d'horloge et de témoin de ceinture passager continuent de fonctionner normalement.
7. Verdict de la direction technique
La mise à niveau de votre Toyota C-HR (2016-2023) avec un système multimédia QLED 2K haut de gamme est l'amélioration technologique et intérieure la plus importante disponible pour ce modèle. Elle comble instantanément le fossé entre l'ancienne technologie d'origine et les cockpits intelligents des véhicules les plus récents. Choisir des composants vérifiés et Plug & Play directement auprès de spécialistes reconnus comme Smarty-trend.com garantit une durabilité matérielle de premier ordre, un rendu acoustique haut de gamme via un traitement numérique du signal dédié, et une finition premium impeccable qui rehausse à la fois le confort quotidien de votre véhicule et sa valeur sur le marché de l'occasion.
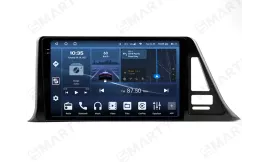

| Système d'exploitation: | Android 14 |
| Affichage: | 9.5 inches QLED 2.5D |
| Résolution: | 2K (2000x1200 px) / HD (1280x720 px) |
| Processeur: | 2.7 GHz Octa-core (UIS7870CS) |
| RAM + SSD: | 4+64 / 6+128 / 8+128 / 8+256 / 12+256 Gb |
| Car link: | Sans fil Apple CarPlay Android Auto |
| Cadeau gratuit: | DVR avec ADAS / TPMS / Caméra arrière HD |
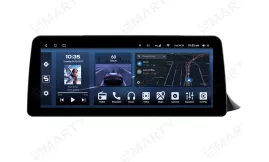
| Système d'exploitation: | Android 13 |
| Affichage: | 12.3 pouces QLED 2.5D |
| Résolution: | Full HD ultra-large (1920x720 px) |
| Processeur: | 2.0 GHz Octa-core (UIS7862S FYT) |
| RAM + SSD: | 2+32 / 4+64 / 6+128 / 8+128 / 8+256 Gb |
| Car link: | Sans fil Apple CarPlay Android Auto |
| Cadeau gratuit: | DVR avec ADAS / TPMS / Caméra arrière HD |
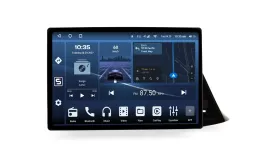
| Système d'exploitation: | Android 15 V |
| Affichage: | 12.5 inches QLED |
| Résolution: | 2K (1920x1200 px) |
| Processeur: | 2.0 / 1,6 Ghz Octa-core (UIS7862 / 8581A) |
| RAM + SSD: | 4+64 / 6+128 / 8+128 / 8+256 Gb |
| Car link: | Sans fil Apple CarPlay Android Auto |
| Cadeau gratuit: | DVR avec ADAS / TPMS / Caméra arrière HD |
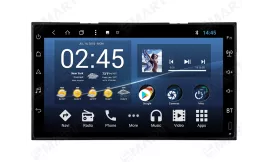
| Système d'exploitation: | Android 13 |
| Affichage: | 9 pouces IPS |
| Résolution: | HD (1024х600 px) |
| Processeur: | 1.8 GHz Octa-core (UIS7862 TS10) |
| RAM + SSD: | 4+64 / 6+128 / 8+256 Gb |
| Car link: | Sans fil Apple CarPlay Android Auto |
| Cadeau gratuit: | DVR avec ADAS / TPMS / Caméra arrière HD |
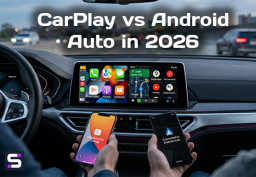
CarPlay vs Android Auto en 2026 : lequel choisir pour votre...
Guide des processeurs pour autoradios Android 2026 : Comparatif...
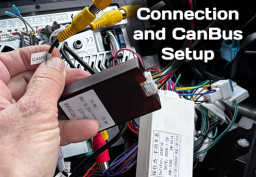
Comment configurer le CanBus sur un autoradio Android
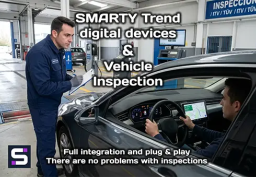
L'autoradio Android et le compteur digital affectent-ils le...

Autoradio Android vs. Radio d'origine : Cela vaut-il le coup de...
 FR
FR DE
DE
 EN
EN
 ES
ES
 IT
IT
 NL
NL
 PL
PL
 PT
PT
 RU
RU