




Ford Edge (2015–2022) Tesla-Style Android Head Unit Installation Guide
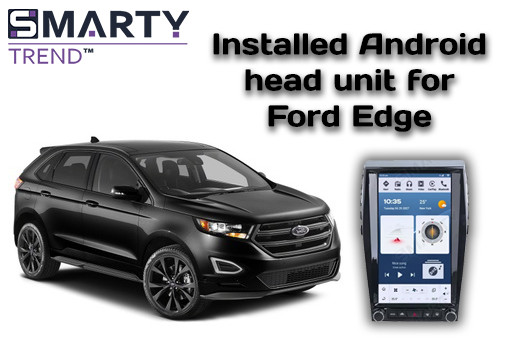
This comprehensive technical manual provides a step-by-step framework for installing a premium Tesla-style Android head unit in the Ford Edge (2015-2022). Learn how to properly disassemble the factory dash, connect the plug-and-play harness, and ensure complete integration of climate controls and steering wheel sync by SMARTY Trend.
Tesla-Style Android Head Unit Installation Guide for Ford Edge (2015–2022)
A Professional Engineering & Integration Blueprint by SMARTY Trend™
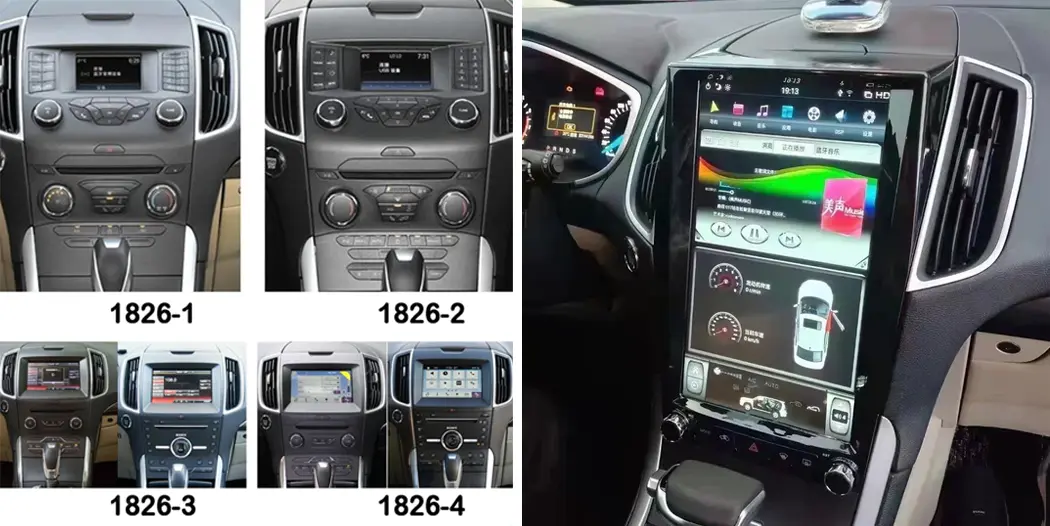
Modern automotive multimedia demands uncompromising functionality, fluid UI responsiveness, and seamless ecosystem integration. The factory-installed infotainment configurations found in the second-generation Ford Edge - ranging from basic small-screen Sync 1 setups to aging Sync 2 or Sync 3 modules - increasingly fail to satisfy modern driver demands for real-time navigation flexibility, high-fidelity audio tailoring, and digital aesthetics. Upgrading the central console to a premium vertical Tesla-style Android head unit completely revolutionizes the cabin experience, engineering it into a cutting-edge digital cockpit. This technical guide outlines the precise architectural standards, wiring layouts, and step-by-step physical deployment workflow used by SMARTY Trend experts.
1. System Architecture & Hardware Specifications
The core challenge of implementing a massive vertical display is the comprehensive preservation and digital replication of the vehicle’s complex factory subsystems. SMARTY Trend achieves this via an intelligent, dedicated CAN-bus decoder box included with each model. This module decodes complex vehicle network matrices to bridge communication between Ford’s native platform and the high-performance Android hardware.
| Technical Parameters | SMARTY Trend™ Premium Specification | Direct End-User Impact |
|---|---|---|
| Display Configuration | 13.6" IPS / QLED Vertical Form Factor | Ultra-wide viewing angles, exceptional anti-glare metrics, and parallel multi-window layout showing maps and climate controls concurrently. |
| Processing Unit (CPU) | High-Performance 8-Core (Octa-Core) 1.8GHz - 2.0GHz | Instantaneous application boot times, zero UI latency, and smooth processing of computationally heavy modern map elements. |
| Memory Allocation | 4GB / 8GB LPDDR4X RAM paired with 64GB / 128GB Flash ROM | Aggressive, stable multi-tasking without background application crashes or system throttling. |
| Audio DSP Engine | Integrated Digital Signal Processor with 32-Band Equalizer | Precise acoustic time alignment, custom frequency crossovers, and sharp spatial acoustics that significantly outperform stock sound processing. |
| Smartphone Interface | Wireless Apple CarPlay & Wireless Android Auto | Immediate, hands-free synchronization for calls, messaging platforms, streaming audio, and driver apps upon starting the car. |
2. Comprehensive Step-by-Step Installation Workflow
The retrofitting process is organized into three mandatory phases: careful structural interior panel disassembly, pin-to-pin wiring integration, and console seating.
⚠️ CRITICAL SAFETY NOTICE:
Before commencing any phase of disassembly, always disconnect the negative (-) terminal of the vehicle's battery. This eliminates the risk of short circuits, terminal component damage, or diagnostic fault codes in the SRS/Airbag management systems.
Phase 1: Disassembling the OEM Dash Stack
- Using a non-marring plastic trim removal wedge tool, gently unclip and release the vertical decorative side trim panels running along both the driver and passenger sides of the center console stack.
- Unsnap and extract the top plastic tray cover positioned above the main factory infotainment monitor to expose the hidden upper structural retention screws.
- Extract the exposed retention screws using a 7mm socket driver or corresponding Torx bit (dependent on your specific sub-trim level).
- Firmly but carefully pull the integrated factory physical climate panel and radio faceplate outward toward the cabin space. Disconnect all bundled wiring harnesses locked into its rear board.
- Unscrew and draw out the OEM Sync display screen and its dedicated Audio Control Module (ACM) located deeper in the dash bay. Unplug the primary power source blocks, factory USB runs, and radio antenna leads.
Engineering Adaptation Insight: During disassembly, note that depending on your premium SMARTY Trend head unit's specific design modification, the physical factory climate control circuit sub-board may either be entirely replaced by our dynamic on-screen digital touch matrix, or its OEM board elements may relocate into the mounting chassis of your new kit to maintain physical command line redundancy.
Phase 2: Harness Mapping and Interface Integration
- Mate the principal SMARTY Trend main wiring bundle directly into the vehicle's factory multi-pin connector. The system uses a strict Plug & Play (Pin-to-Pin) standard; cutting, splicing, or modifications to your Ford factory harness are entirely unnecessary.
- Snap the provided CAN-bus decoder block into its designated socket connection branch on the new main harness. This module maps steering wheel controls, dynamic parking lines, reverse triggers, and vehicle telemetry.
- Route the high-gain external GPS antenna and 4G LTE transceiver modules behind the instrument cluster or up inside the front A-pillar trim for unshielded satellite positioning and cell tower signal capture.
- Integrate the factory rearview backup camera using the included RCA conversion harness, or verify the digital video stream paths route appropriately through the CAN-bus data lines.
- Extend the supplementary USB auxiliary pigtail cables through into the passenger glove compartment to provide accessible connectivity for high-capacity external flash storage media or mobile accessories.
Phase 3: Unit Seating and Initial Assembly
With all interface connections securely bound and double-checked, dress the excess wiring harnesses neatly inside the internal structural void of the dashboard cavity. Slide the Tesla-style console frame smoothly into the factory dashboard mounting tabs, lock it down utilizing the original 7mm screws, and re-engage all decorative accent panels.
3. Native Ford Edge Ecosystem Integration
The metric of an outstanding system retrofit lies in its capacity to achieve complete synchronicity with native electronic modules. SMARTY Trend's tailored system profiles feature high-tier integration across key onboard diagnostic frameworks:
- Dual-Zone Climate Matrix: Complete operational handling of dual-zone temperature selectors, blower fan speeds, windshield defrosters, and heated/ventilated seat grids is mapped directly onto the lower, static section of the vertical touchscreen.
- Steering Wheel Controls (SWC): Factory media keys for volume control, track seek, voice control activation, and phone call handling integrate instantly via the CAN-bus protocol without requiring manual key learning configurations.
- Parking Systems: The system retains native integration for factory sonar proximity sensors (retaining audio pings and overlaying active visual vehicle radars over camera feeds) and renders precise dynamic wheel trajectory path geometry when turning the steering wheel.
4. Frequently Asked Questions (FAQ)
Q1: Will my vehicle's premium factory Sony amplifier and subwoofer work seamlessly?
A: Yes. SMARTY Trend's advanced installation packages feature a specialized CAN-bus integration profile that signals the factory digital Sony amplifier to wake via the native network architecture. Balanced multi-channel audio distribution and full low-end subwoofer fidelity are preserved.
Q2: Does the large vertical screen cause parasitic battery drain over time?
A: No. The device strictly follows power state broadcast instructions received via the vehicle's network bus. Once the ignition key is cycled off and a door exit is registered, the head unit transitions into a deep-sleep cycle. Power consumption drops under a nominal 0.01A threshold, abiding perfectly by Ford’s standard battery energy management parameters.
Q3: How do I change the climate system temperature display format from Fahrenheit to Celsius?
A: In most cases, metric/imperial unit conversion completes automatically during your initial drive as telemetry parameters sync. If manual calibration is required, navigate to Settings -> Factory Settings (Access Code: 8888 or 126), access the CAN-bus protocol parameter matrix under 'Ford Edge', and toggle the Temp Unit value manually to Celsius.
Q4: Can I still access native Ford Sync voice commands?
A: The legacy factory voice engine is completely replaced by a far more advanced, context-aware artificial intelligence interface. Users gain access to Google Assistant and online/offline voice command managers, which process continuous natural phrasing for adjustments to navigation, system media, and applications with vastly improved accuracy.
5. Executive Engineering Verdict
Upgrading your Ford Edge 2 (2015-2022) with a vertical Tesla-style infotainment screen is the single most impactful technological enhancement available for the model. It brings older vehicles up to par with the latest model-year cockpits. Selecting verified components directly from premium specialists like Smarty-trend.com guarantees top-tier hardware durability, high-end acoustic output via dedicated digital signal processing, and a flawless premium finish that enhances both your vehicle's utility and market value.

| Operation system: | Android 11 R |
| Display: | 13.6 inches IPS |
| Resolution: | Full HD Vertical (1920x800 px) |
| Processor: | 2.0 GHz Octa-Core (Snapdragon 665) |
| RAM + SSD: | 4+64 / 8+128 Gb |
| Car link: | Wireless Apple CarPlay & Android Auto |
| Free gift: | DVR with ADAS / TPMS / HD Rear Camera |

CarPlay vs Android Auto in 2026: Which One to Choose For Your Phone...
Android Head Unit Processors Guide 2026: Snapdragon vs. UIS Full...

How to Set Up CanBus on Android Car Radio: Step-by-Step
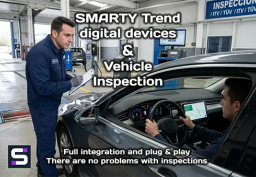
Does installing an Android screen or digital dash affect the MOT?

Android Head Unit vs. Factory Radio: Is It Worth Upgrading in 2026?
 EN
EN DE
DE
 ES
ES
 FR
FR
 IT
IT
 NL
NL
 PL
PL
 PT
PT
 RU
RU