



Toyota C-HR (2016-2023) Android 15 Installation Guide: 2K QLED SMARTY Trend Head Unit with CarPlay & OEM Camera Integr
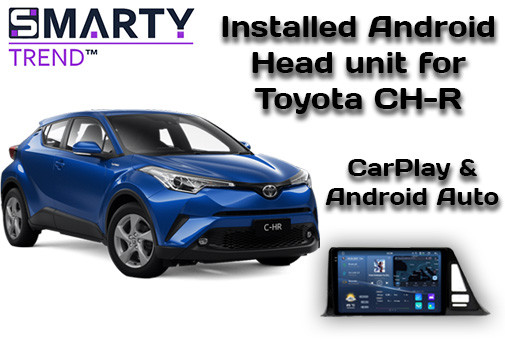
A step-by-step installation guide for the SMARTY Trend Android 15 head unit in a Toyota C-HR (2016-2023). Learn how to mount the 2K QLED display, retain the factory backup camera, and configure the CAN-Bus module via a seamless Plug & Play connection.
Comprehensive Installation Guide: SMARTY Trend Android Head Unit for Toyota C-HR (2016-2023)
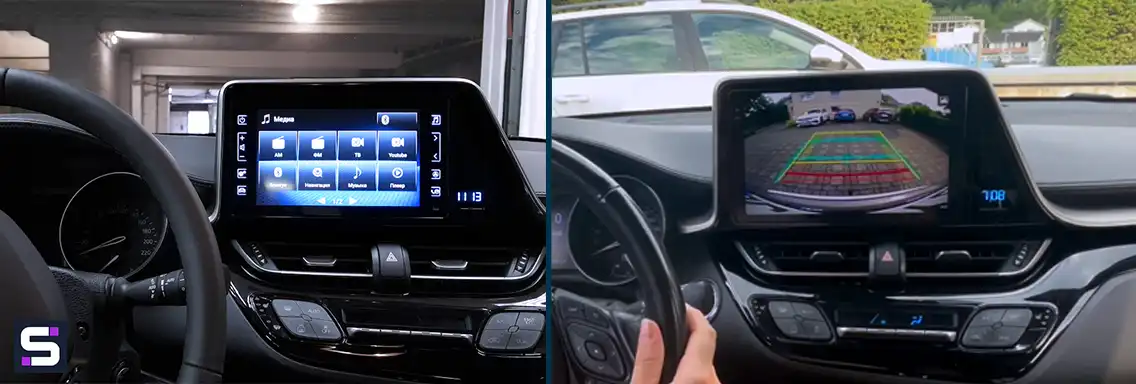
The Toyota C-HR (2016-2023) is a stylish and reliable urban crossover, but its factory Toyota Touch 2 infotainment system has fallen significantly behind modern standards. It lacks speed, screen resolution, and seamless wireless smartphone integration. In this expert guide, we will break down how to replace the factory screen with a premium SMARTY Trend Android head unit featuring Apple CarPlay and Android Auto, while fully retaining all original vehicle features.
Factory Screen vs. SMARTY Trend Infotainment System
To understand the massive upgrade in ergonomics, performance, and audio quality, let's compare the key specifications:
| Feature | Factory Toyota Touch 2 | SMARTY Trend Premium System |
|---|---|---|
| Operating System | Closed factory OS (highly restricted) | Android 15 (Access to millions of Play Store apps) |
| Processor (CPU) | Outdated low-frequency chip | 2.7 GHz Octa-core (UIS7870CS) - Instant response |
| Memory (RAM + SSD) | Less than 1-2 Gb / Minimal storage | 12 Gb RAM + 256 Gb SSD (Seamless multitasking) |
| Display & Matrix | 7-8" TN/IPS (washed out, sun glare) | 9.5" QLED 2.5D (Vibrant colors, anti-glare coating) |
| Screen Resolution | 800x480 pixels (noticeable pixelation) | 2K Super HD (2000x1200 px) - Crystal clear clarity |
| Navigation | Outdated Toyota maps (paid updates required) | Google Maps, Waze, Sygic with real-time traffic |
| Smartphone Interface | Limited wired CarPlay/AA (facelift models only) | Built-in Wireless Apple CarPlay & Android Auto |
1. Required Tools & Equipment
No specialized professional workshop equipment is required for a successful installation. The entire process can be completed using a basic set of tools:
- 10mm Socket & Ratchet - Used to remove the 4 main bolts securing the factory head unit.
- #2 Phillips Screwdriver - For securing the vents and transferring the original passenger airbag/clock display modules.
- Plastic Trim Removal Tools - To safely unclip the dashboard panels without scratching the interior plastics.
- Soft Towel or Protective Cloth - Placed over the center console and gear shifter to prevent accidental scuffs during installation.
2. Key Integration Benefits of SMARTY Trend
- Full CAN-Bus Integration: The head unit communicates directly with the car's computer, fully retaining steering wheel controls and climate control data display.
- OEM Backup Camera Support: The original factory camera plugs directly into the new system, activating Dynamic Parking Lines (active steering guidelines) that respond to the steering wheel angle.
- Interior Aesthetics Maintained: Reinstalling the factory clock and hazard warning assembly ensures that your dashboard retains its original, clean look.
3. Step-by-Step Installation Guide
Before starting, turn off the engine, ensure the ignition is completely OFF, and disconnect the negative terminal of the battery for safety. Cover the center console with a soft cloth to protect the interior.
Step 1: Disassembling the Factory Multimedia & Panels
- Using a plastic trim tool, gently pry up and remove the side decorative dash trim and the climate control panel. They are held in place by factory clips.
- Carefully unclip the central air vents assembly. Note that it is secured by two screws. Remove them using a #2 Phillips screwdriver, and pull the vent unit out after disconnecting the hazard light button connector.
- Remove the main plastic frame (bezel) surrounding the original monitor. Be extra cautious around the right corner near the Push Start button - apply gentle, even pressure. Disconnect the plug powering the clock and passenger airbag indicators.
- Using a 10mm socket wrench with a ratchet, unscrew the 4 mounting bolts holding the metal brackets of the factory screen inside the dash cavity.
- Pull the factory radio toward you, slide it out of the dashboard, and carefully unplug all the wiring harnesses from the rear.
Step 2: Modifying the Frame & Transferring OEM Components
- Place the removed factory dash panel face down on a flat, soft surface.
- Using your Phillips screwdriver, unscrew and remove the original clock and safety display module.
- Place this module into the new SMARTY Trend fascia panel/bezel included in the kit and secure it tightly using the original screws. This preserves your factory clock and passenger seatbelt indicators seamlessly.
Step 3: Connecting the Wiring Harness (Plug & Play)
- Take the main wiring harness provided in the SMARTY Trend kit.
- Connect the car's original plugs into the corresponding sockets of the new harness ("connector-to-connector"). No cutting, splicing, or soldering of factory wires is required.
- Plug the CAN-Bus decoder box into its designated connector on the main harness.
- Antenna & Port Placement:
- GPS Antenna: Mount it in a location where there are no metal obstructions above it that could block satellite signals. It is highly recommended to position and stick it directly underneath the plastic top of the dashboard.
- 4G/Wi-Fi Antennas & Extra USB Ports: Route these cables carefully into the glove box compartment for easy future access.
- Connect all remaining plugs into the rear ports of the new SMARTY Trend head unit.
Step 4: Mounting the New Android Head Unit
- Carefully position the fully assembled unit (9.5" QLED screen integrated into the new bezel) back into the dashboard opening.
- Secure the system using the original 10mm bolts and reinstall the central vents and trim pieces in the reverse order of disassembly. Ensure all clips click firmly into place with zero gaps.
4. ⚙️ Configuring the CAN-Bus Module for Proper Operation
After turning on the head unit for the first time, you must synchronize the Android system with the Toyota C-HR onboard computer via the CAN-Bus network. Without this step, steering wheel controls and dynamic camera lines will not function.
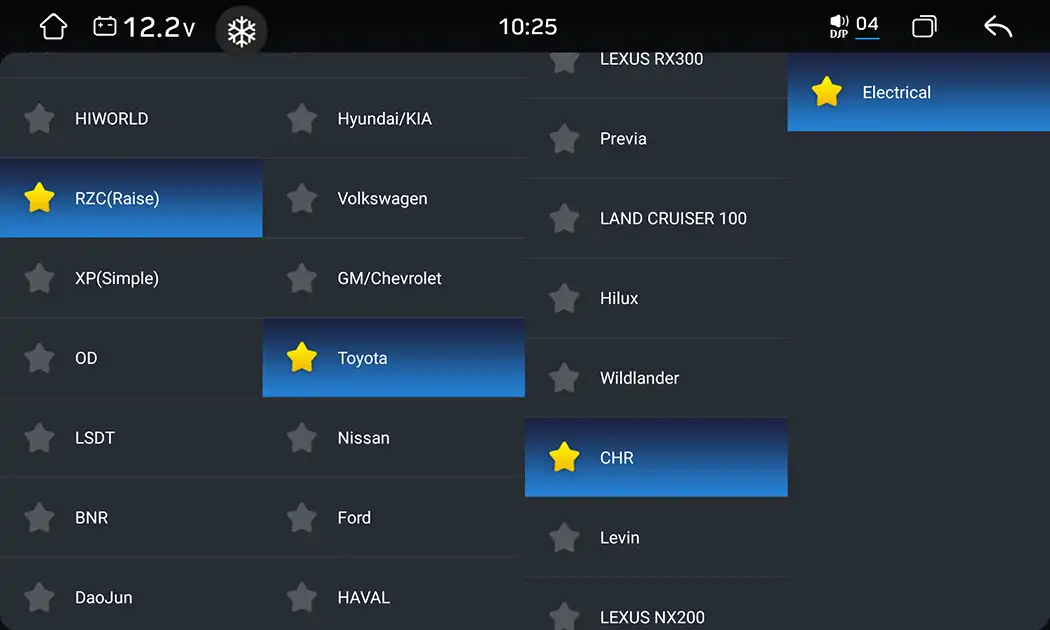
- Navigate to Settings > Car Infotainment > Factory Settings.
- Enter the developer passcode (usually
3368or8888, depending on your specific UIS7870CS firmware version). - Locate the CAN-Bus Settings / Car Model Selection menu.
- Select the manufacturer of your CAN box decoder (e.g., Raise, Simple Soft, or Hiworld - the brand is printed right on the CAN module's plastic casing).
- Select the car brand: Toyota > Model: C-HR > and choose your specific vehicle year range (2016-2023).
- Click Save and allow the system to reboot.
Once rebooted, the system will automatically sync with your vehicle. Test the volume and track-skipping buttons on the steering wheel, check if door opening triggers screen overlays, and shift into reverse to verify that the factory camera activates alongside its fluid dynamic parking guidelines.
5. Step-by-Step Video Tutorial
If you prefer a visual walk-through of the panel disassembly, plug connections, and the stunning final look, check out our comprehensive video guide created by our installation specialists:
6. Frequently Asked Questions (FAQ)
Q: Will my factory backup camera still work?
A: Yes. The SMARTY Trend head unit fully supports the original OEM backup camera. Furthermore, thanks to the CAN-Bus module, active parking lines will bend as you turn the steering wheel.
Q: Will this installation void my car's warranty?
A: No. The installation is 100% Plug & Play. The original car wiring harness remains completely untouched with no wire cutting, meaning the process is entirely reversible and safe for dealership electrical warranties.
Q: Does the original dashboard clock still function after the swap?
A: Yes, this guide includes the crucial step of transferring the factory clock and hazard warning circuit board into the newly supplied SMARTY Trend frame. All timekeeping and seatbelt warning features continue to work normally.
7. Executive Engineering Verdict
Upgrading your Toyota C-HR (2016-2023) with a premium 2K QLED infotainment system is the single most impactful interior and technological enhancement available for this model. It instantly bridges the gap between older factory tech and the latest model-year intelligent cockpits. Selecting verified, plug-and-play components directly from premium specialists like Smarty-trend.com guarantees top-tier hardware durability, high-end acoustic output via dedicated digital signal processing, and a flawless premium finish that enhances both your vehicle's daily utility and its long-term market value.
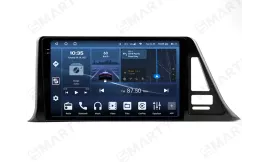

| Operation system: | Android 14 |
| Display: | 9.5 inches QLED 2.5D |
| Resolution: | 2K (2000x1200 px) / HD (1280x720 px) |
| Processor: | 2.7 GHz Octa-core (UIS7870CS) |
| RAM + SSD: | 4+64 / 6+128 / 8+128 / 8+256 / 12+256 Gb |
| Car link: | Wireless Apple CarPlay & Android Auto |
| Free gift: | DVR with ADAS / TPMS / HD Rear Camera |
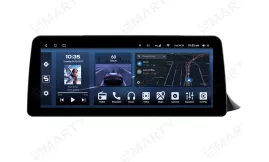
| Operation system: | Android 13 |
| Display: | 12.3 inches QLED 2.5D |
| Resolution: | Full HD Ultra-wide (1920x720 px) |
| Processor: | 2.0 GHz Octa-core (UIS7862S FYT) |
| RAM + SSD: | 2+32 / 4+64 / 6+128 / 8+128 / 8+256 Gb |
| Car link: | Wireless Apple CarPlay & Android Auto |
| Free gift: | DVR with ADAS / TPMS / HD Rear Camera |
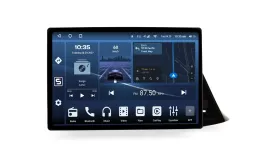
| Operation system: | Android 15 V |
| Display: | 12.5 inches QLED |
| Resolution: | 2K (1920x1200 px) |
| Processor: | 2.0 / 1.6 Ghz Octa-core (UIS7862 / 8581A) |
| RAM + SSD: | 4+64 / 6+128 / 8+128 / 8+256 Gb |
| Car link: | Wireless Apple CarPlay & Android Auto |
| Free gift: | DVR with ADAS / TPMS / HD Rear Camera |
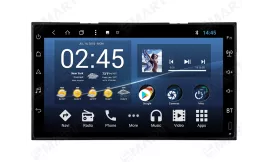
| Operation system: | Android 13 |
| Display: | 9 inches IPS |
| Resolution: | HD (1024х600 px) |
| Processor: | 1.8 GHz Octa-core (UIS7862 TS10) |
| RAM + SSD: | 4+64 / 6+128 / 8+256 Gb |
| Car link: | Wireless Apple CarPlay & Android Auto |
| Free gift: | DVR with ADAS / TPMS / HD Rear Camera |
CarPlay vs Android Auto in 2026: Which One to Choose For Your Phone...
Android Head Unit Processors Guide 2026: Snapdragon vs. UIS Full...
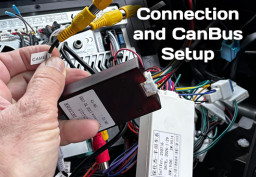
How to Set Up CanBus on Android Car Radio: Step-by-Step
Does installing an Android screen or digital dash affect the MOT?

Android Head Unit vs. Factory Radio: Is It Worth Upgrading in 2026?
 EN
EN DE
DE
 ES
ES
 FR
FR
 IT
IT
 NL
NL
 PL
PL
 PT
PT
 RU
RU