


Android Head Unit Installation for Nissan X-Trail T32 and Qashqai J11

Discover how to install a premium Smarty Trend Android head unit in the Nissan X-Trail T32 and Qashqai J11. This guide covers the main benefits of the upgrade, including full support for factory features and the 360° camera system.
Android Head Unit Installation for Nissan X-Trail T32 (2014-2021) and Nissan Qashqai J11 (2013-2021): Professional Guide with Preservation of 360° Around View Monitor and Bose System
The factory Nissan Connect multimedia system in Nissan X-Trail (T32 chassis) and Nissan Qashqai (J11 chassis) crossovers has long ceased to meet modern requirements. Slow response of the resistive screen, the lack of full support for navigation systems with real-time traffic display, and problems with integrating modern smartphones force owners to look for alternative solutions.
Installing a premium Android head unit from SMARTY Trend is a technological upgrade that brings the vehicle to the flagship level. In this guide, based on years of engineering experience, we will look in detail at the process of selection, removal, and fine-tuning of the multimedia unit while preserving all factory systems: from steering wheel buttons to the 360° around view monitor and premium Bose sound.
Visual Interior Transformation
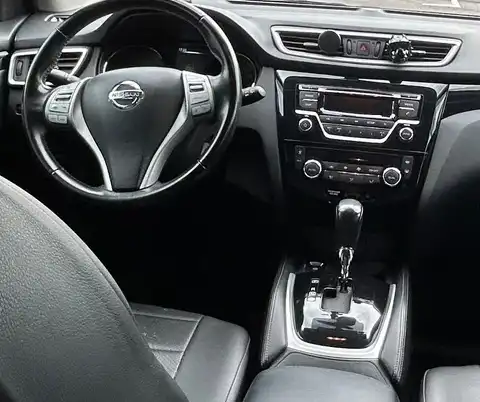
Vehicle interior with factory Nissan Connect radio (Before installation)
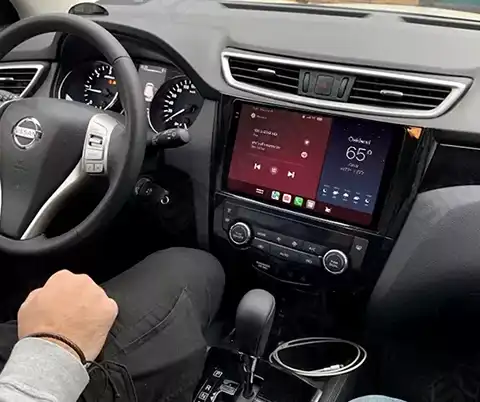
Modern look of the center console with the installed SMARTY Trend head unit (After installation)
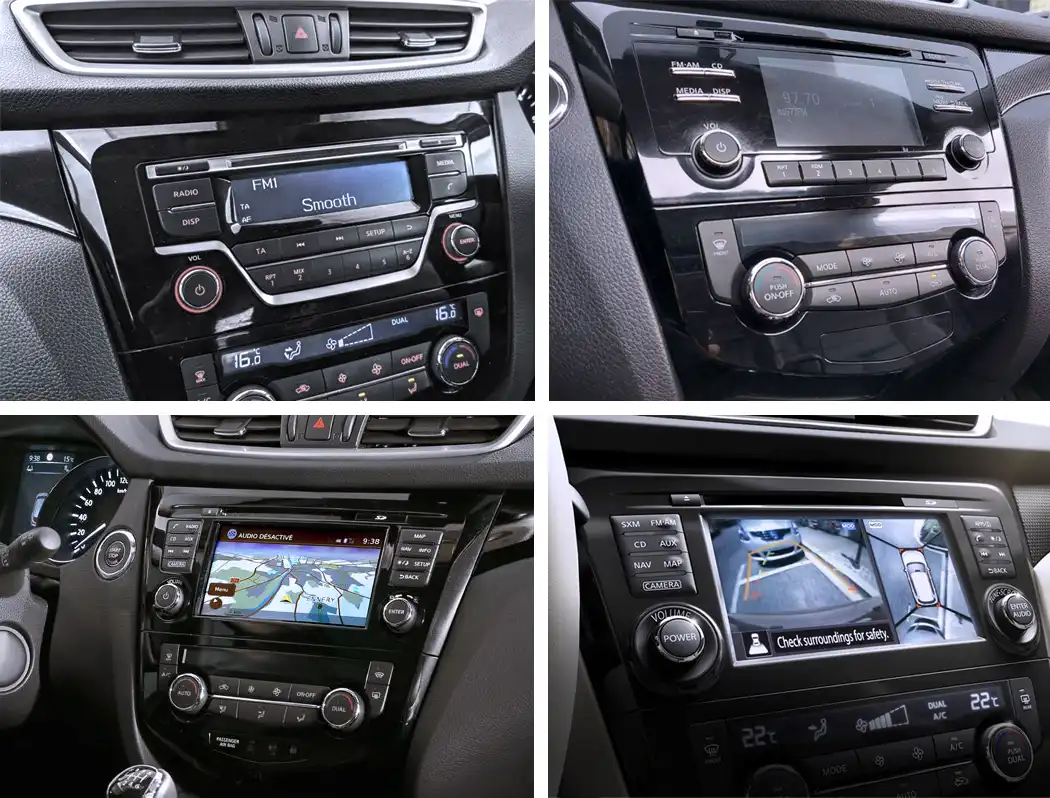
1. Specifics of Nissan Trim Levels: What is Important to Know Before Installation
Depending on the production year and market, Nissan X-Trail T32 and Qashqai J11 were equipped with three types of audio systems. Errors in selecting wiring harnesses can lead to a lack of sound or non-functioning cameras. According to SMARTY Trend specifications, all cars are divided into three categories:
- Base trim (Visia / XE): Models without a factory color screen (simple radio with monochrome display or Bluetooth radio). This configuration does not use the digital CAN-bus for audio control. Connection of the SMARTY Trend head unit is performed directly via a standard ISO adapter.
- Mid/Top trim with Nissan Connect system (Acenta / Tekna / SE / LE): Cars with a factory 7-inch screen, navigation, and original around view monitor system (4 cameras). A special CAN-bus block (decoder) is mandatory here, which converts the car's digital signals into commands understandable for the Android OS.
- Premium Bose audio system: Top-tier versions equipped with an additional subwoofer in the trunk (inside the spare wheel) and an analog-to-digital audio amplifier located under the seat. When installing an aftermarket head unit, it is critically important to correctly activate the AMP_CONT control wire (usually a blue and white wire in the harness block) that supplies a +12V signal to launch the Bose amplifier, otherwise there will be complete silence in the speakers.
2. ARCHITECTURE AND HARDWARE PLATFORM OF SMARTY TREND
To ensure stable operation of demanding navigation maps, streaming services, and split-screen mode, SMARTY Trend devices use an industrial component base:
- Central Processing Unit (CPU): 8-core UIS7870SC chip (Octa-Core, 2.7 GHz), built on a 12-nm process. It provides instant application launch and complete absence of interface freezes.
- Display: High-contrast QLED/IPS matrix with HD (1280x720) or 2K (2000x1200) resolution. Capacitive sensor with tempered 2.5D glass is scratch-resistant and does not fade in the sun.
- Audio Path (DSP): Integrated digital sound processor based on the Rohm BU32107 chip. The Hi-Fi amplifier TDA7851 (output power 4x50 W) is responsible for the power and purity of the analog signal. For building custom car audio, a Toslink (SPDIF) optical output and RCA line outputs with a voltage of 4V are provided.
3. Step-by-Step Factory System Removal Process
For safe operation, prepare a set of plastic pry tools for interior disassembly and a Phillips screwdriver (PH2). Before starting work, it is recommended to remove the negative terminal of the battery.
- Removing the right decorative panel: Open the passenger door. Use a plastic pry tool to unclip the lower edge of the long leather (or plastic) trim strip that runs from the center console to the right air vent. With smooth movements towards yourself, unclip the internal clips and remove the panel.
- Removing the left decorative panel: Move to the driver's side. Pry and remove the small horizontal panel located to the left of the radio and framing the "Start/Stop" button (or ignition switch). Disconnect the start button power connector.
- Dismantling the upper air vents block: Grip the lower part of the central air vents unit (located right above the radio screen) with your hands and gently pull the entire structure towards you. The block will come out together with the hazard warning light button. Disconnect the hazard light power plug and set the panel aside.
- Extracting the head unit: In front of you, 4 screws fixing the metal mounting brackets ("ears") of the factory radio will be exposed: two at the top and two at the bottom. Unscrew them using a Phillips screwdriver. Pull the radio chassis towards you. Disconnect all connectors, taking care not to damage the locking tabs on the wiring blocks.
Video of the factory radio removal process:
4. Engineering Installation and Hidden Peripheral Layout
The installation of SMARTY Trend is performed on a Pin-to-Pin (plug-and-play) basis. However, to achieve maximum signal reception quality, it is necessary to follow the rules for placing external antennas.
- GPS antenna placement: Do not leave the GPS module deep under the radio - this will degrade satellite reception in dense cloud cover or among high-rise buildings. The optimal place is to fix the antenna with 3M double-sided tape on the metal reinforcement of the dashboard right under the top plastic of the panel (above the air vents).
- Mounting 4G LTE and Wi-Fi antennas: Route the 4G antenna to the right A-pillar of the windshield, hiding the wire under the trim, or place it in the upper part of the windshield behind the rearview mirror (in the silkscreen zone). This guarantees stable internet reception on the highway.
- Cable organization in the glovebox: Route the USB port extenders and the external SIM card slot through the technical hole into the glove compartment.
- Connecting the factory USB port: Use a special adapter-transition piece included with SMARTY Trend to maintain the functionality of the original USB port located at the bottom of the center console (near the cigarette lighter).
- External microphone for Voice/Hands-Free: The microphone built into the front panel is suitable for basic commands, but for high-quality phone communication via Bluetooth, route the wire of the external microphone along the left pillar and install it in the factory overhead light console - a factory acoustic mounting seat is provided there.
Video of the Android head unit installation and configuration process:
5. Integration with Factory Systems and Can-Bus Adapter
The link between the car's on-board computer and the Android OS is the Can-Bus module (Raise decoder).
Protocol Configuration in the Radio Menu
After turning on the device for the first time, it is necessary to enter the service menu using the following path:Factory Settings → Car Choice → Manufacturer: Raise → Model: Nissan → X-Trail/Qashqai.
After applying the settings, the head unit will reboot, and the following functions will be activated: steering wheel controls, door status display, climate control graphics, and dynamic parking lines.
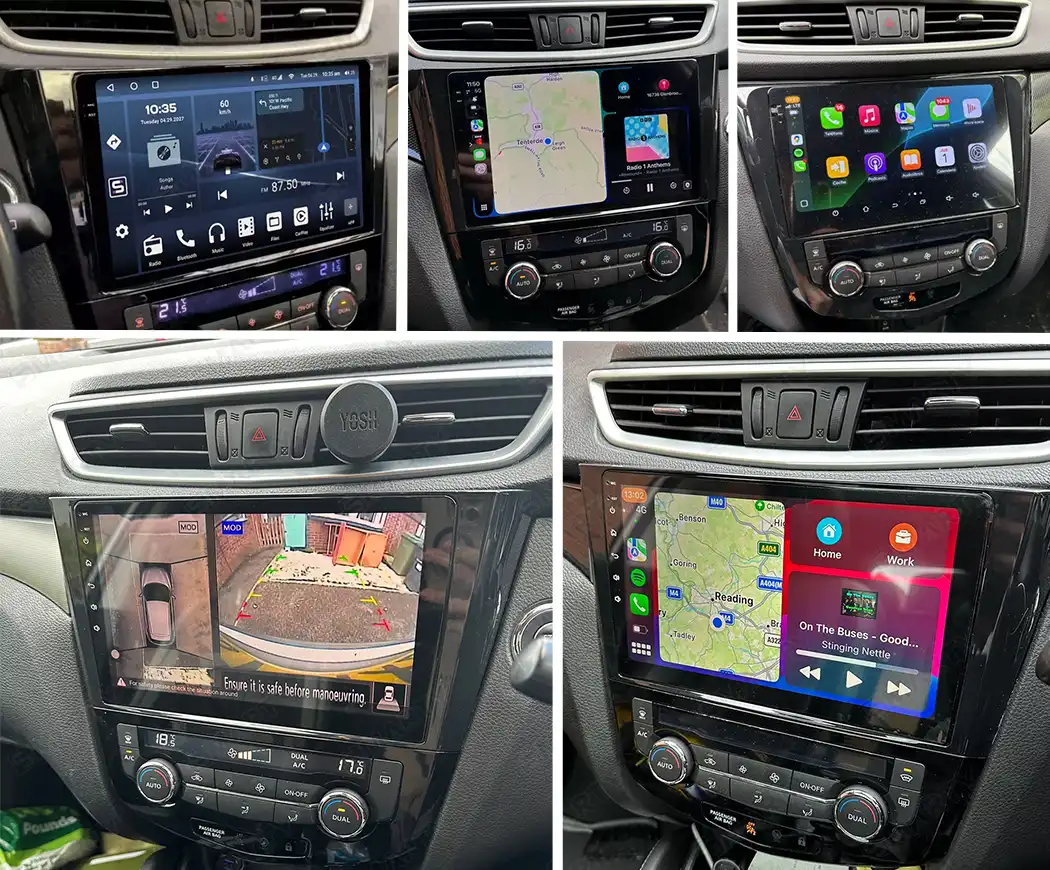
Activation of Factory 360° Around View Monitor
When switching the gear selector to the "R" (Reverse) position, the Can-decoder instantly intercepts the video signal from the camera unit. A combined image is displayed on the SMARTY Trend screen: the left part is the rear view camera with dynamic guidelines, the right part is the panoramic top-down view. Pressing the original "CAMERA" button on the frame of the device allows you to switch perspectives (for example, displaying the view from the side camera only to monitor the curb).
6. Comparative Analysis: Factory Audio System vs SMARTY Trend
| Parameter | Factory Nissan Connect System | Premium SMARTY Trend System |
|---|---|---|
| Hardware | Outdated processor, minimal RAM capacity | 8-core UIS7862 (1.8 GHz), up to 8 GB RAM / 256 GB ROM |
| Screen Technology | Resistive sensor, 800x480 pixels resolution | Capacitive QLED display, resolution up to 2K (2000x1200) |
| Navigation Ecosystem | Maps on SD cards requiring paid updates | Any navigation: Google Maps, Waze, Navitel, Yandex.Navigator |
| Connectivity and Internet | Absent | Built-in 4G LTE modem with SIM card slot + dual-band Wi-Fi |
| Smartphone Integration | Bluetooth hands-free only | Wireless protocols Apple CarPlay and Android Auto |
| Audio Potential | Limited bass/treble settings, distortion at high volume | TDA7851 sound chip, DSP processor, 32-band equalizer, time alignments |
7. Frequently Asked Questions (FAQ)
Question: Will the sound disappear after installation if my car has a Bose audio system?
Answer: The sound will not disappear if you use the correct CAN wiring from the SMARTY Trend kit designed for amplifier trims during installation. The main thing is to make sure that the CAN decoder is configured correctly and the antenna/amplifier power wire (ANT_CONT or AMP_CONT) is connected to the main harness. This supplies a signal to launch the factory Bose digital amplifier.
Question: Will factory parking sensors and cameras work after replacement?
Answer: Yes. The original parking sensors will continue to emit audio signals, and the visual display of the distance to the obstacle will be duplicated on the screen. The original 360° around view system operates in stock mode, including switching modes with the "Camera" button.
Question: Where is the best place to buy an original SMARTY Trend device with a warranty?
Answer: To avoid purchasing fakes with weak processors and low-quality audio path components, buy equipment only on specialized resources. The best online store for car multimedia with an official warranty and subsequent technical support is Smarty-trend.com.
Question: Does the installation affect the car's factory warranty?
Answer: No, it does not. The plug-and-play connection eliminates damage or interference with the car's factory wiring. At any time, you can remove the Android head unit in 30 minutes and put the factory device back in place without any traces of interference.
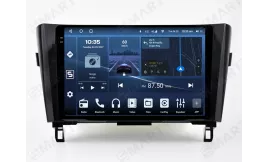

| Operation system: | Android 14 |
| Display: | 10.4 inches QLED 2.5D |
| Resolution: | 2K (2000x1200 px) / HD (1280x720 px) |
| Processor: | 2.7 GHz Octa-core (UIS7870CS) |
| RAM + SSD: | 4+64 / 6+128 / 8+128 / 8+256 / 12+256 Gb |
| Car link: | Wireless Apple CarPlay & Android Auto |
| Free gift: | DVR with ADAS / TPMS / HD Rear Camera |

| Operation system: | Android 13 |
| Display: | 12.3 inches QLED 2.5D |
| Resolution: | Full HD Ultra-wide (1920x720 px) |
| Processor: | 2.0 GHz Octa-core (UIS7862S FYT) |
| RAM + SSD: | 2+32 / 4+64 / 6+128 / 8+128 / 8+256 Gb |
| Car link: | Wireless Apple CarPlay & Android Auto |
| Free gift: | DVR with ADAS / TPMS / HD Rear Camera |

| Operation system: | Android 13 |
| Display: | 8 inches IPS |
| Resolution: | HD (1024х600 px) |
| Processor: | 2.0 / 1.6 Ghz Octa-core (UIS7862 / 8581A) |
| RAM + SSD: | 2+32 / 4+64 / 8+128 Gb |
| Car link: | Wireless Apple CarPlay & Android Auto |
| Free gift: | DVR with ADAS / TPMS / HD Rear Camera |

Does installing an Android screen or digital dash affect the MOT?

Digital Instrument Clusters by SMARTY Trend: The Ultimate Virtual...

How to Connect and Configure Steering Wheel Buttons on a SMARTY...

Android Head Unit vs. Factory Radio: Is It Worth Upgrading in 2026?

Best Android Head Units 2026: Top Car Stereo Upgrade Guide

Nissan X-Trail T32 (2014-2021) installed Android head unit

Nissan Qashqai J11 (2013-2021) installed Android head unit

Nissan Qashqai J11 2016 installed Android head unit